
Disclosure: Some of the links on this page are affiliate links, which means that at no cost to you, I will earn a commission if you click through and make a purchase through my links.
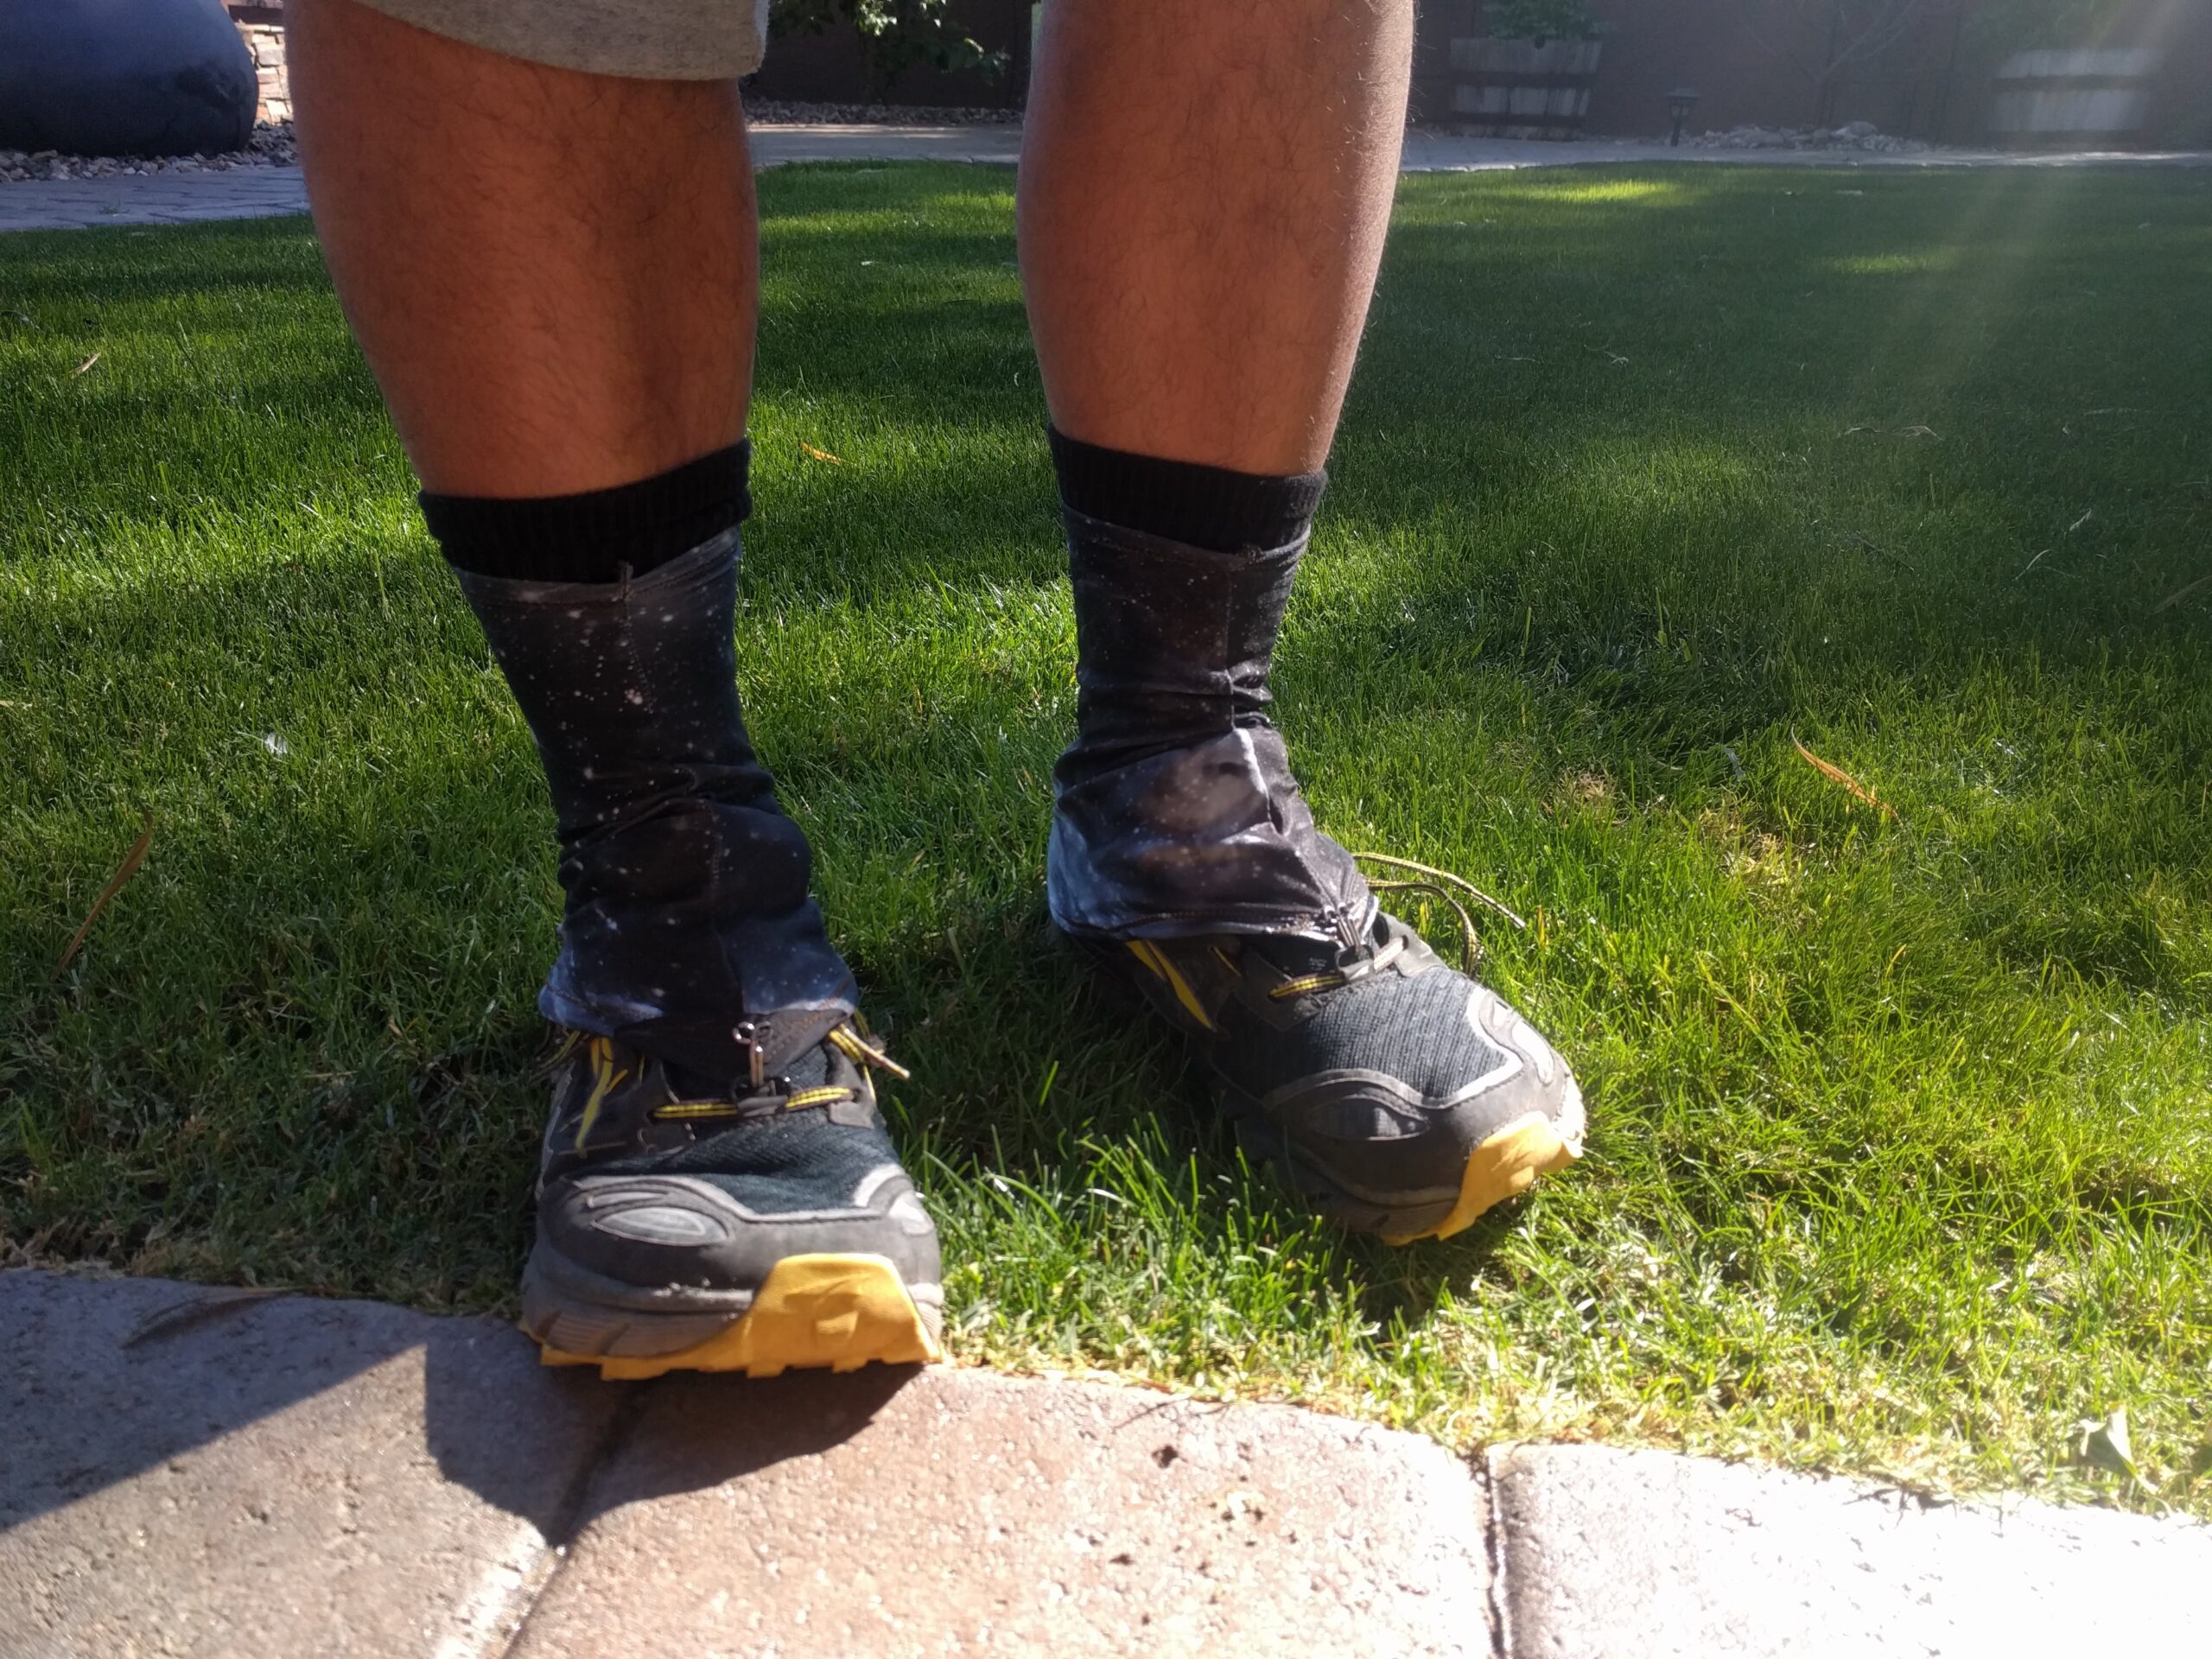
Ultralight gaiters are very popular among long-distance hikers. They keep rocks and sticks out of your shoes, they prolong the life of your socks, and they are comfortable and lightweight enough that you don’t even notice them. I used to buy Dirty Girl gaiters and I loved them, but it seemed like an easy piece of gear to DIY.
I ran through about 4 prototypes until I found what worked best for me. They aren’t perfect, but they are pretty good and totally functional. Plus, I bought a yard of spandex for $15 at JoAnne Fabrics which yielded 4 pairs even after trial and error, so it’s definitely cheaper. The measurements I used should work for most, but they are easy to adjust to your personal preference if you need. A half-yard of fabric should yield about 5 gaiters, so there is room for some mistakes.
What You’ll Need
Ripstop by the Roll is an excellent source for fabrics and materials for MYOG projects.
Paper Roll or Newspaper for Making Pattern – regular or legal paper is not large enough, but if you are desperate you could tape a few sheets together.
Measuring Tape
Marking Pen
Fabric Scissors
Straight Pins or Clips
Sewing Machine
Polyester Thread – Nylon or other threads would work, but no cotton.
½ yard of Spandex I used a poly/spandex blend and it worked well.
Scraps of Cordura, Ballistic Nylon or Pack Cloth– I had some leftover scraps lying around from my backpack. You can also buy fabric samples from Ripstop for just a few bucks.
Large Hook & Eye Hooks – needs to be large enough to hook onto a shoelace, so look for large or extra large.
Velcro Strips – With adhesive backing, or you could get without and use superglue.
Step One: Make the Pattern
Gather your paper/newspaper, measuring materials, pen, and scissors. Mark out and cut a rectangle 22cm high and 40cm wide. Fold in half lengthwise, reopen the fold, and set the paper in front of you with the crease up.

Measure 2cm from the top of the paper and fold it down. It might help to draw a line first, then fold along the line. Do the same along the bottom edge .

Keep these pieces folded over as you re-fold the paper along the center crease.

With the paper still folded, measure along the top folded edge, from the creased center outward toward the raw edge, to 9cm. Make a mark. Along the bottom, measure out 19cm, and make a mark. If you have small feet, take this down to 18cm. Draw a line from the top mark to the bottom mark. This will be a diagonal line.

Cut along the line. Open the paper and all folds. This is your pattern.

Step Two: Cut the Fabric
Place the pattern on your fabric. You could pin and cut, but I find it easier to just trace and cut, using a pen or marker on the underside of the fabric. Cut out 1 piece.

Step Three: Hem the Edges
Hem the edges. The top and bottom edges should fold over perfectly aligned. Fold the hem over, toward the inside of the fabric. For a nice strong hem, I prefer to fold over twice, just to keep the raw edges tucked in. This leaves a 1 cm hem in place. Pin the hem using straight pins.

Now it’s time for the sewing machine. Sewing with spandex is tricky, so I recommend grabbing a few scrap pieces of fabric and testing out your stitches before trying it on your gaiter. Check tension. Because the fabric is stretchy the feeder feet will stretch out the bottom layer as it feeds through. You have to combat this with slow methodical sewing and careful feeding of the fabric, plus a little bit of stretching. You might even have to raise the foot once or twice to adjust how the fabric is feeding.

Time to get sewing. Sew along the edge of the hem, removing pins as you go. I used zig-zag stitch here, but if you only have straight stitch that is fine. There will be some puckering. This is inevitable, but once the gaiter is on your foot it won’t be noticeable so don’t worry too much about it. More stretching of the fabric means more puckering, so just be careful and do the best you can. I find it is easier to start from the middle of the fabric and sew to the edge, then turn it around and sew middle to edge again, rather than going from one end to the other.
Step Four: Sew the Edges
Once both top and bottom hems are complete, fold the fabric in half lengthwise. Keep the fabric inside-out, so you are looking at the unprinted side. Pin the two raw edges together, and sew the two pieces of fabric together as close to the edge as possible.

If you were using a zig-zag stitch, switch your machine to a straight stitch. Sew a parallel line along the inside of the zig-zag stitch, from top to bottom.

The gaiter should still be inside out. Switch it to right side out, and try it on. This size should fit most, but now is the time to make sure it isn’t too loose or too tight on your calves. If it is too tight, you’ll have to start again with a new pattern, making the top measurement longer. If it is too loose, you can easily bring it in by sewing a new stitch line slightly inside of the original, and trim out the excess fabric.
Step Five: Trim and Reinforce the Tip
Take the gaiter off, and bring your attention to the front point. There is a good deal of excess fabric here. Cut it off. We’re going to reinforce this area but we don’t want the tip sticking way out, so don’t worry about the raw edge.


Gather your durable nylon fabric, and cut out a rectangle several inches wide. Using a lighter, sear the edges to prevent fraying. We’re going to fold this over the tip, but for now, just line it up straight across, pin it and sew it in place with the straight stitch.


Turn it over, and fold the lower portions of the fabric over/around the “tip” and pin in place.

Trim off any excess bits of fabric at the tip and sear the edges. Using the straight stitch, sew along the edges of the reinforced tip as well as across the middle.

It should look something like this, but will vary slightly from gaiter to gaiter.

Step Six: Attach the Hook and Velcro
Almost done. Using a needle and thread, attach the hook to the reinforced tip of the gaiter. I like to attach it just so the edge of the hook aligns with the point of the tip.

Cut a strip of velcro (The soft fuzzy/loop side) about 2 inches long. Attach it to the inside of the gaiter, along the bottom and opposite to the tip (aka the heel end). Sew it in place using a straight stitch.

Some shoes come with a velcro gaiter trap already in place on the heel of the shoe. If you don’t have a gaiter trap, cut a similar size piece of velcro (the scratchy/hook side) to attach to the heel of the shoe. You can use Velcro with a sticky backing to it, or just use a bit of superglue to attach it to your shoe. Make sure the gaiter fits correctly before going on to the second one.

Repeat Steps 2-6, and Done! Put on your gaiters, put on your shoes. Attach the velcro pieces together, and use the hook to attach the tip to your shoelace (unless your shoes have an attachment point for gaiters).

I’d Love Your Feedback
If you found this tutorial tricky or confusing, please leave a comment so I can clarify and improve this tutorial. If you’d like to try another, check out my post on how to sew a stuff sack with a square bottom and drawstring closure.
I am continually in awe of everything y’all do…hiking , sewing , cooking , etc . One proud mom here ♡
Reblogged this on moorishmicroadventure and commented:
An excellent tutorial that is well worth a read.
Cool, thanks!
Thank you for sharing! I just used your tutorial and it worked perfectly! I only made one adjustment: instead of the Velcro for the heel attachment, I used another scrap of poly fabric on the back with another hook that fit perfectly on my heel straps.
Thanks for sharing how you made gaiters. I’m trying these out now, but they look and feel great.
My sewing machine doesn’t have a zig-zag option, is that going to be an issue?
Thanks
CarolK
You can use a straight stich, just make sure to stretch the fabric while you are sewing it, so it has room to stretch out when you put them on.
I’m a little late to the game, but great DIY Gaiter tutorial, I really appreciate you sharing this. Since the Covid lock down lifted I’ve been trying to hike my butt off, literally – you know the Covid 10, right? ;)… and needed to restock on a few things. I do have a tip for you to make sewing stretchy material easier; in addition to using all purpose polyester thread and a narrow zigzag stitch, use a twin ball point needle (aka stretch needle) and a walking foot. The walking foot helps move both the top and bottom layer of your material along together with the feed dogs on the bottom of your machine, and bonus points…I have never had a stitch skip when sewing or one pop on the trail (or anywhere else), even if I did a straight stitch instead of a zigzag stitch, when using a twin ball point needle.
Maybe we’ll run into each other on the trail some day, I’ll be the one with the 2 Airedale Terriers and 2 Rough Coat Jack Russell Terrorists (that wasn’t a typo). Don’t judge, my little Jack Russell Terrorists (before I got my Airedales) saved me more than once from both mountain lion attacks and bear encounters… they’re the bomb…and at only 12lbs take up very little room and are super portable too! I can really appreciate their small size and light weight combined with the heart of a lion since getting my Airedales, it’s no joke towing two 50 lb fur rugs across deep water with two 12 pounders perched on top of my pack, all dry and comfy with their tails wagging so hard they go in circles like a helicopter blades…I can almost hear them laughing at the three of us fools nearly waist deep in freezing cold water… the little brats!
I’m now even later to the (comment) game, but as someone wandering the woods with at least one Airedale, I was thrilled reading your comment and would love to follow your adventures, in case you’re sharing them somewhere online 🙂
I’ve wanted to make these gaiters since some years now and will finally do this week, many thanks for the great guide, Megan!
Thanks for sharing…I just started sewing my own and I basically don’t have any real experience, using my mom’s machine. The game changer for me when sewing this stretchy material is self adhesive water soluble stitching fleece. I just apply it to every layer of fabric that I want to sew. It prevents the fabric from stretching during the process.
All the best from Germany
Annika
I’m going to use a old race shirt and try to use some of the existing bend hems. Thanks for this!!
Great idea!