
Disclaimer: Some of the links on this page are affiliate links. If you click on an affiliate link and make a purchase, I will earn a small commission at no cost to you. I appreciate your support of this website.
If you’re looking to venture into making your own gear, a stuff sack is a great place to start. What I love the most about this stuff sack is the rectangular/square bottom. It fits gear better and stands up when it is filled. Another great feature is the felled seams, which not only look professional but keep the seams from unraveling.
This isn’t a dry sack (it only has a drawstring closure) but can be used to keep your clothes or sleeping bag dry if you already use a trash bag liner to protect the contents of your bag. Use silnylon material and seal the seams after you complete the sack and you’ll have a great additional barrier against moisture. If you’re using the stuff sack for gear that doesn’t need as much protection, feel free to use other fabrics. I made a stuff sack for our tent from ripstop nylon treated with DWR, because I’d like the tent to be in a breathable bag during the day, but I’ve made a variety from silnylon as well.
What You’ll Need
Sewing Machine
Straight Pins
Marking Pen
Measuring Tape
Scissors
Ripstop, Silnylon (or other preferred material)
Safety Pin

Step 1: Measure and Cut
First you need to decide how wide and how tall you want your stuff sack. My measurements are not super precise but they are close enough for me. I’m a lazy measurer.
For the height, H = x + 6.25” where x is the desired final height, but H is the amount you need to measure and cut.
So, for a height of 10”
H=10”+6.25”, or
H=16.25”
This is how much fabric to measure for the height.
The width will be different at the top and bottom of this bag. Decide how large you want the top to be.
For the width, W= 2(y+1.5), where y is the desired width, and W is the amount you need to measure and cut.
So for a bag that measures 11” across the top laid flat
W= 2(11+1.5)
W=2(12.5)
W=25”
This is how much to measure for the width.
Bear in mind that the width at the bottom of this bag will be 4-6” shorter than at the top, depending on the size of your bag. This is because the bottom of the bag is square/rectangular.
Measure, mark, and cut your fabric W inches wide and H inches long. (OK, no more calculations, just simple measuring from here on out).

Step 2 : Hem the Sides
Spread the fabric out on a table in front of you. Fold the right edge over ¾” and pin in place. Do the same with the left edge. The cut edge of fabric should be facing “up” on both sides.

Take out some scrap pieces of fabric and test it out on the machine. Silnylon is very slippery and takes some careful work. The tension might need to be adjusted in order to get a balanced stitch. Work out the problems now, before you actually start sewing the stuff sack.
Using a straight stitch, sew each hem in place, removing the pins as you go. Because silnylon is so slippery, I recommend using more pins than usual. It helps hold everything in place while you sew.

Step 3: Sew the Edges Together
Take the fabric and fold it in half lengthwise. Your two hems should be aligned all the way down, and the rough edges facing “out”. Pin the two layers together along the hemlines.
Next, get out your measuring tape and marking pen. From the top edge, measure down 2¼ inches and make a mark near the hem. Measure and make another mark 2¾ inches from the top. These two marks are ½ inch apart. This ½ inch is a no-sew area. Look closely at the next photo, you can see the markings I made.

Now, time to sew the two sides together. Sew down the edge, about ¾” from the edge. Remember, DO NOT SEW across the ½” area marked off. This is where the drawstring will eventually pull through, so it must be left open.
Step 4: Fell the Seams
The piece of fabric should now be a tube. Open it up. Make sure you left the ½” drawstring opening before continuing.

Place the tube down flat with the newly sewn seam in the middle. Open the two bits of fabric and press them down flat, away from each other and back against the tube. Starting with one side, press down and pin in place.


Sew the seam down flat. Check underneath frequently to make sure you are not inadvertently catching and sewing through extra layers of fabric. While you are sewing the seams down, pull the fabric apart as you sew. Careful work is key here.

Repeat this process with the other side. You should now have felled seams with no exposed raw edges of fabric. The drawstring hole should still be at the top.
Step 5: Sew the Bottom
Lay the tube on the table and flatten it, align the seam down the middle. Measure to make sure it’s truly in the middle, and pin the bottom edges together. Remember, the bottom side is the opposite side to the drawstring hole. Sew the bottom seam in place, ¾” from the edge.

Step 6: Fell the Bottom Seam
This is the hardest step, both to visualize and to execute. The tube should now be a bag, but it is inside out. Turn it right side out, put your hand inside the bag, all the way to one of the bottom corners. Lay your hand flat on the table. The bottom seam should be flat under the palm of your hand.

Keep your hand flat and let the edges of the sack fall down. Flatten them and pull them out of the way the best you can.

Pull up your hand, keeping things as flat as possible, and look at the bottom seam. Open the two edges and flatten them just like the previous seam. I find it easiest to start from the middle and work my way out for this part. Fold one edge under twice and pin in place. (First fold it halfway, then over again down flat so the raw edge is tucked under). Work your way out, as close to the corners as possible, but don’t worry about going all the way to the corner. I find I can usually get within an inch or so.


Sew the seam in place. Again, pull the fabric apart as you sew, and check frequently that you haven’t started sewing through extra layers of fabric by accident. I also find it easier to sew from the middle and work outward during this step. Repeat the process on the second seam.

Hardest Part Over! It should look like this when you are finished, from the right side out:

Or like this inside out:

Step 7: Square off Bottom
Turn the bag back to inside-out. Lay the bag flat with the center seam on one edge.Gather the bottom and flatten it so that it is laid flat in a diamond shape. The bottom seam should be aligned vertically. Measure to make sure it is centered.

From the top point of the diamond, measure down 2” and mark. Draw a line across the tip of the diamond, and pin everything in place. Sew along the line.

Trim off the excess fabric, leaving ¾”.

Fold the edge over itself twice and sew it in place, as close as possible to the original seam.

Flip the bag over and repeat this step for the other side.

You now have a square/rectangular bottom with felled seams. Nice job!

Step 8: Top Hem
Now bring your attention to the top of the bag. With the bag still inside out, pin the top edge down ¾” and sew it in place. Ugly edges should be facing “up” since you’re still working inside out.

Now, you want to fold the top edge over again, this time 1 ½”. Pin it in place then sew.

Turn the bag right side out.
Step 9: Install the Cord
Almost done! Cut a length of cord long enough to go through the drawstring closure with plenty of excess. Stick one end of the cord through a safety pin. Stick the safety pin inside the hole (it should be right at the top now) and slide it around and back out the other side.

Slip the cord lock on, tie off the end of the cord and cut off the excess. Use a lighter to sear the edges and keep the cord from unraveling.

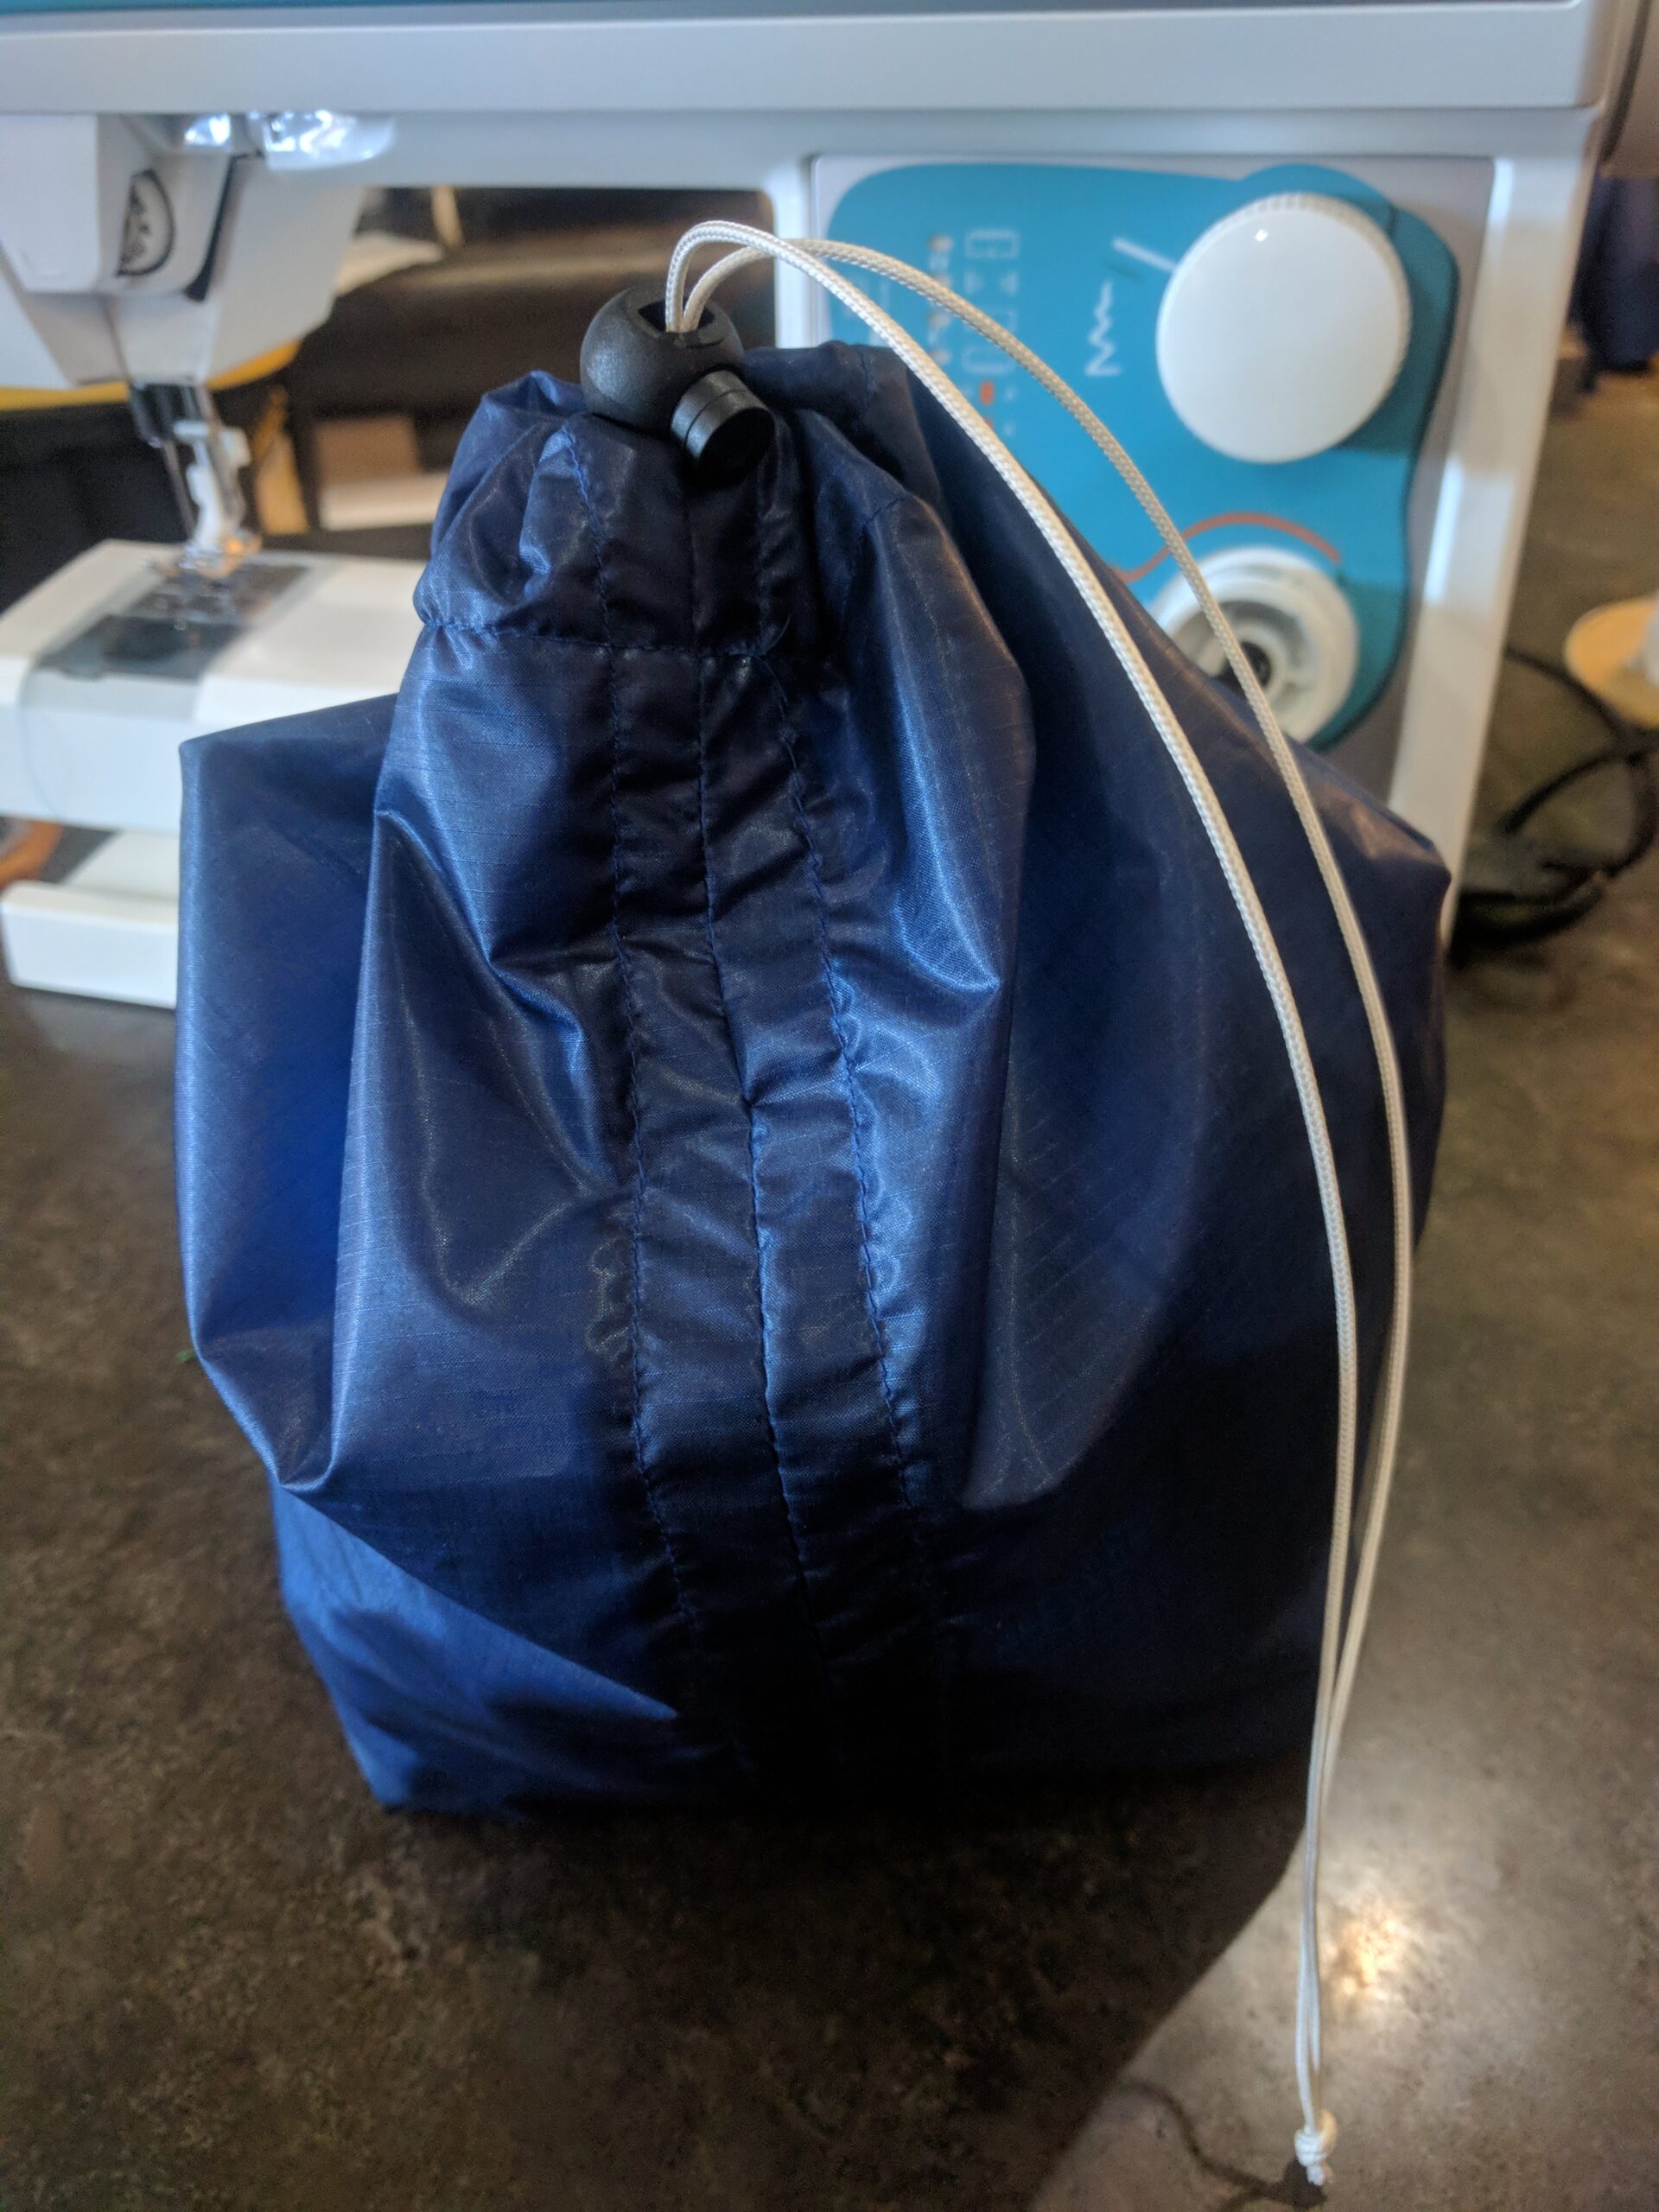
Done! You’ve got yourself a professional looking stuff sack you made yourself. Here’s my bag, filled with the 9 pairs of gaiters I just made!
I’d Love Your Feedback
If you find any of this tutorial confusing or unclear, please leave a comment so I can make improvements.
3 thoughts on “MYOG Tutorial: How to Sew a Stuff Sack”