Disclosure: Some of the links on this page are affiliate links, which means that at no cost to you, I will earn a commission if you click through and make a purchase through my links.
Like most long-distance hikers, Paul and I wear trail running shoes. They are lightweight and comfortable, but they are definitely more prone to getting dirt, rocks, and sticks in them. Ultralight gaiters such as Dirty Girl Gaiters are comfortable, ultralight, and keep rocks out of your shoes. Plus, they prolong the life of your socks. Outdoor Research makes a similar style, but Paul tried these and found the ankle to be very loose, so they were slightly less functional. Altra also makes this style gaiters as well but I haven’t tried them. Across all brands, they run from about $15-$25. Paul and I have used several pairs of the Dirty Girl Gaiters, and I love them, but it also seemed like a really simple thing to make myself, so I gave it a try.
I ran through about 4 prototypes until I found what worked best for me. They aren’t perfect, but they are pretty good and totally functional. Plus, I bought a yard of spandex for $15 at JoAnne Fabrics which will yielded 4 pairs even after trial and error, so it’s definitely a nice cost savings. The measurements I used should work for most, but they are easy to adjust to your personal preference if you need. A half-yard of fabric should yield about 5 gaiters, so there is room for some mistakes.
What You’ll Need
Paper Roll or Newspaper for Making Pattern – regular or legal paper is not large enough, but if you are desperate you could tape a few sheets together.
Measuring Tape
Marking Pen
Fabric Scissors
Straight Pins
Sewing Machine with straight and zig-zag stitch
Polyester Thread – Nylon or other threads would work, but no cotton.
½ yard of Spandex (aka lycra) material – I used a poly/spandex blend and it worked well.
Scraps of Pack Cloth, Ballistic, or other Durable Nylon Fabric – I had some leftover scraps lying around from my backpack.
Large Hook & Eye Hooks – needs to be large enough to hook onto a shoelace, so look for large or extra large.
Velcro Strips – With adhesive backing, or you could get without and use superglue.
Step One: Make the Pattern
Gather your paper/newspaper, measuring materials, pen, and scissors. Mark out and cut a rectangle 22cm high and 40cm wide. Fold in half lengthwise, reopen the fold, and set the paper in front of you with the crease up.
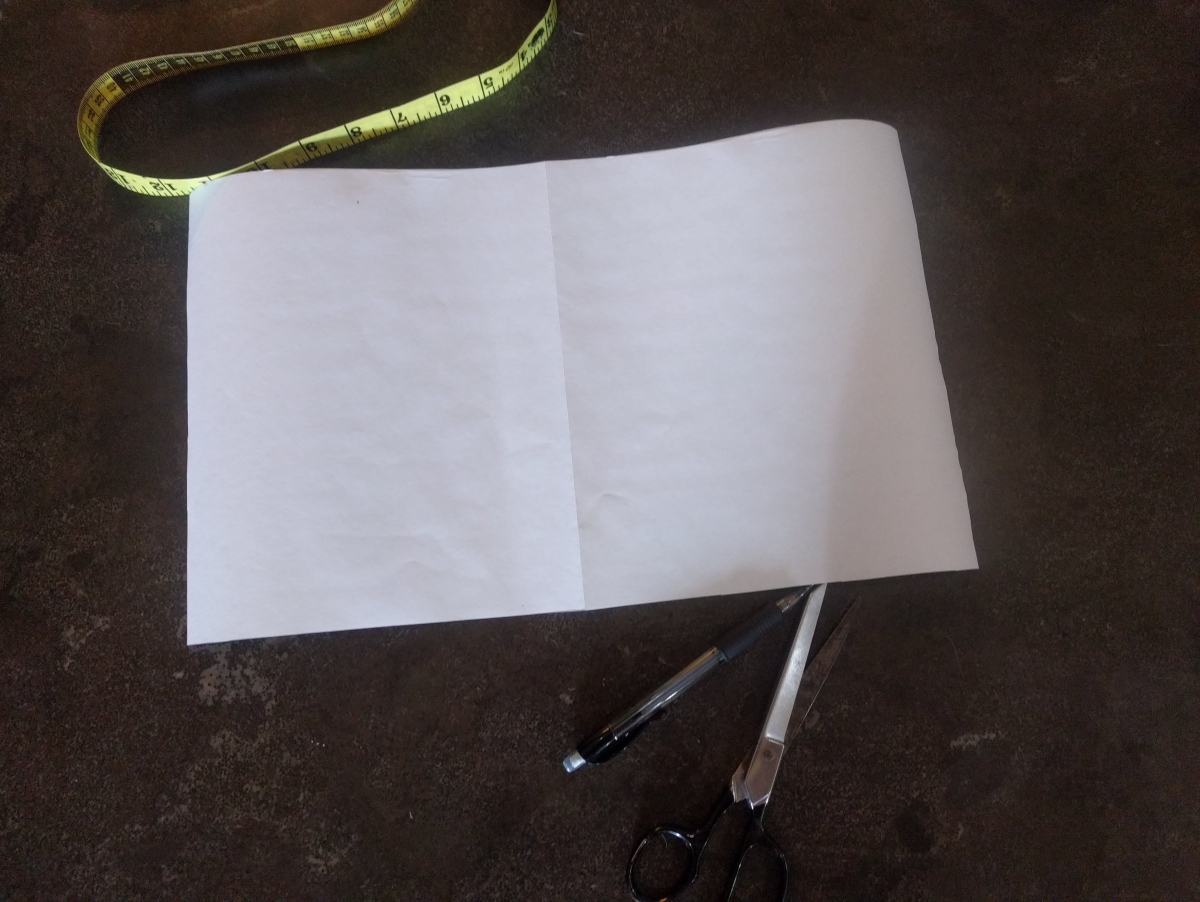
Measure 2cm from the top of the paper and fold it down. It might help to draw a line first, then fold along the line. Do the same along the bottom edge .

Keep these pieces folded over as you re-fold the paper along the center crease.
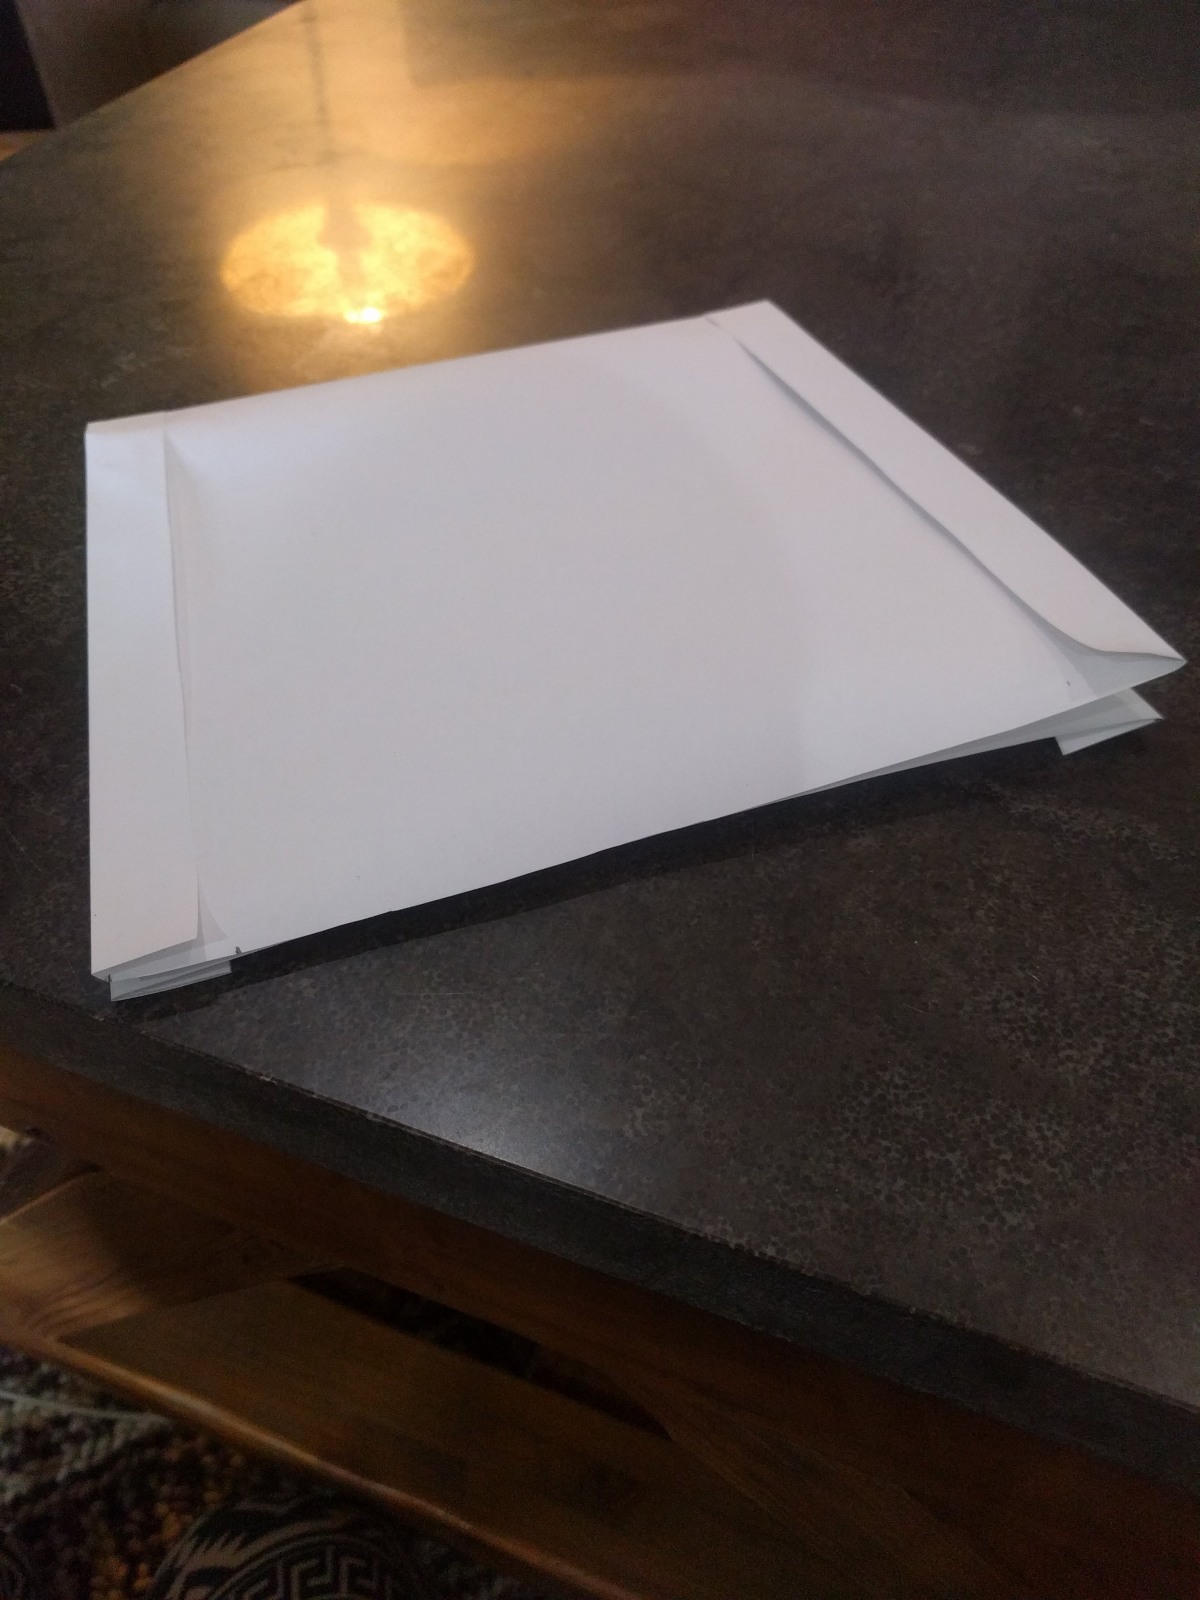
With the paper now folded, measure along the top, from the fold out, to 9cm. Make a mark. Along the bottom, measure out 19cm, and make a mark. If you have small feet, take this down to 18cm. Draw a line from the top mark to the bottom mark. This will be a diagonal line.
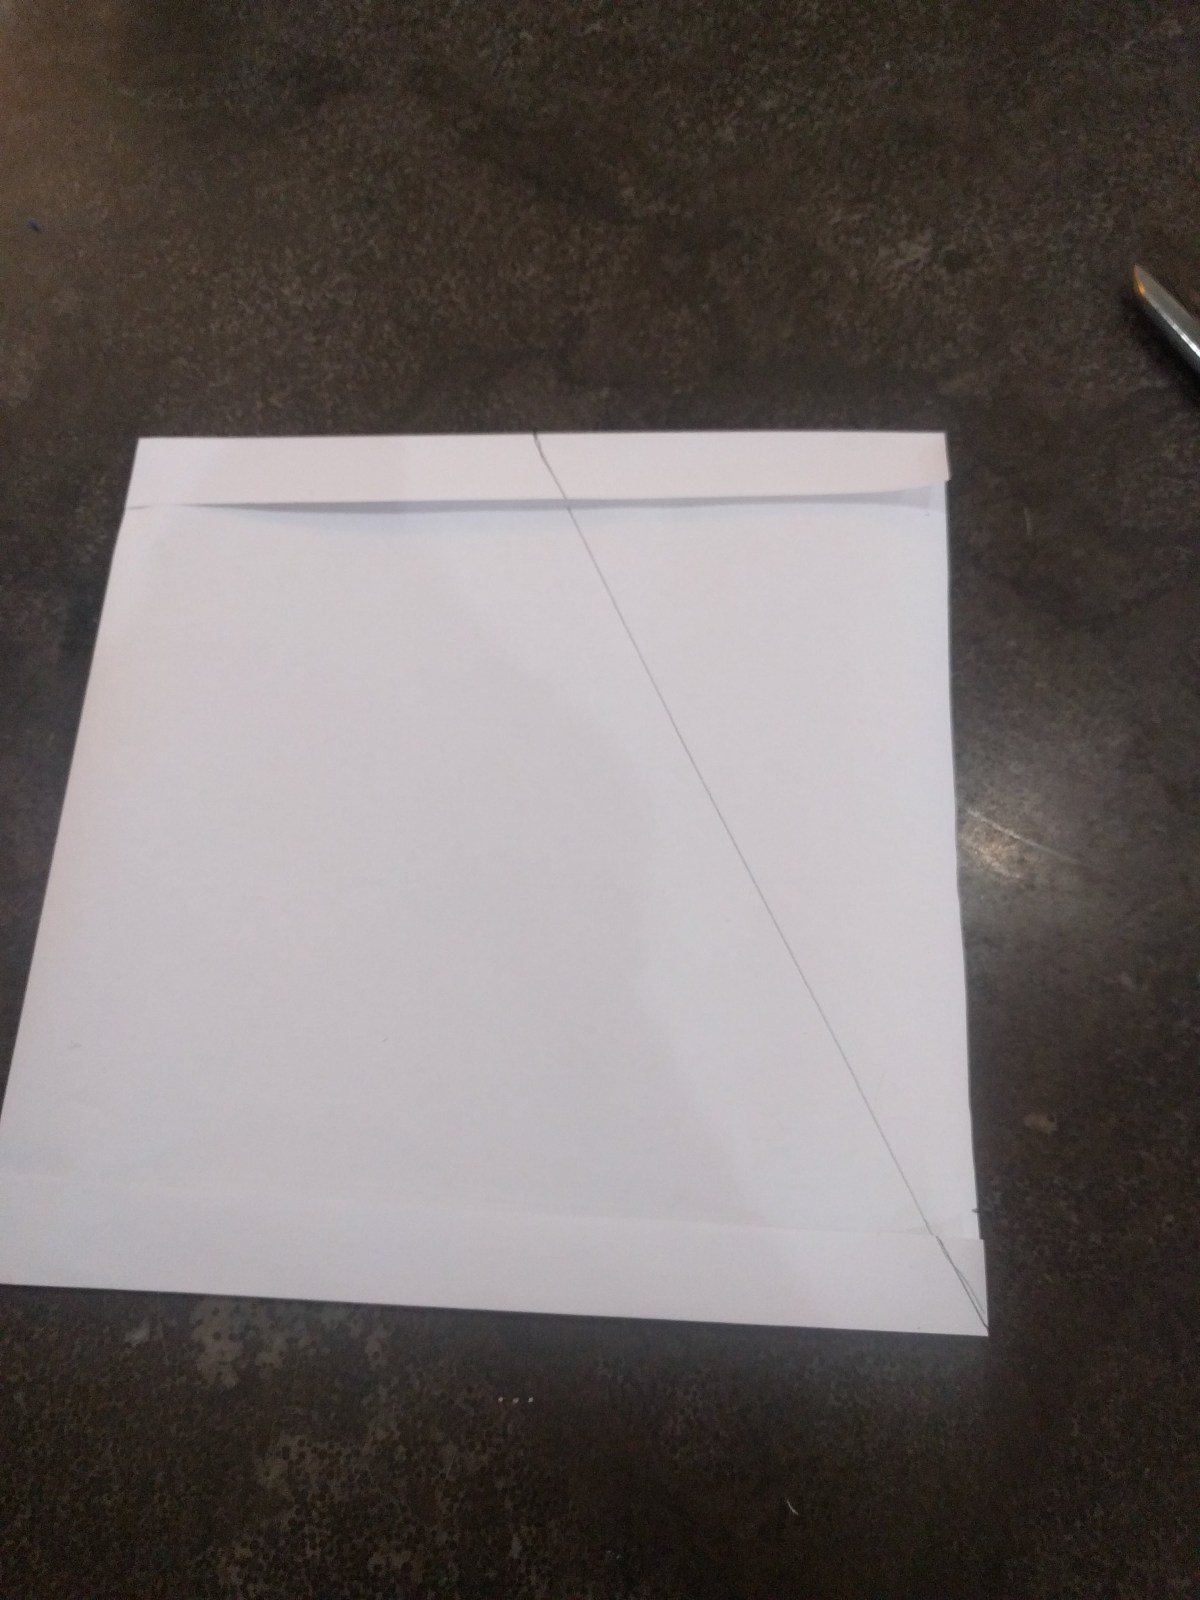
Cut along the line. Open the paper and all folds. This is your pattern.
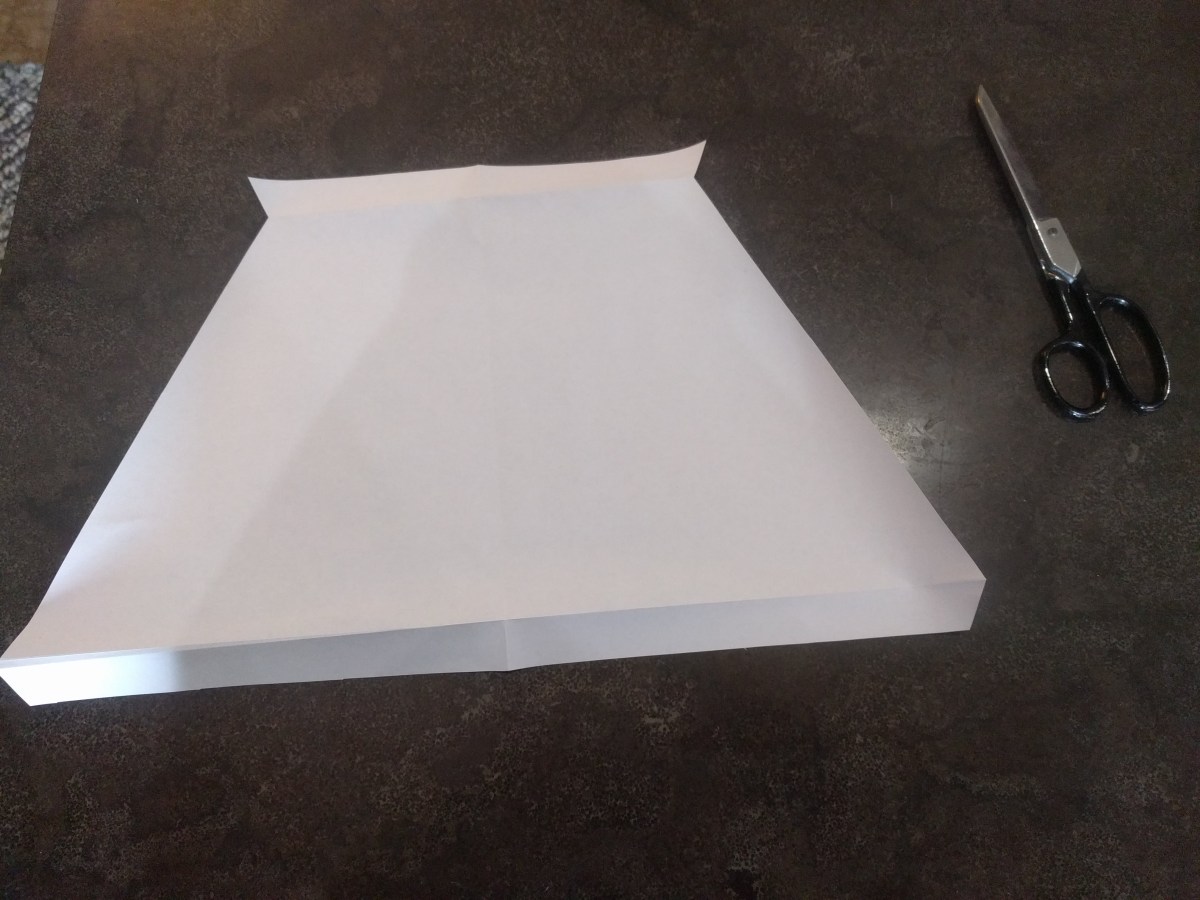
Step Two: Cut the Fabric
Place the pattern on your fabric. You could pin and cut, but I find it easier to just trace and cut, using a pen or marker on the underside of the fabric. Cut out 1 piece.
Step Three: Hem the Edges
Hem the edges. The top and bottom edges should fold over perfectly aligned. Fold the hem over, toward the inside of the fabric. For a nice strong hem, I prefer to fold over twice, just to keep the raw edges tucked in. This leaves a 1 cm hem in place. Pin the hem using straight pins.
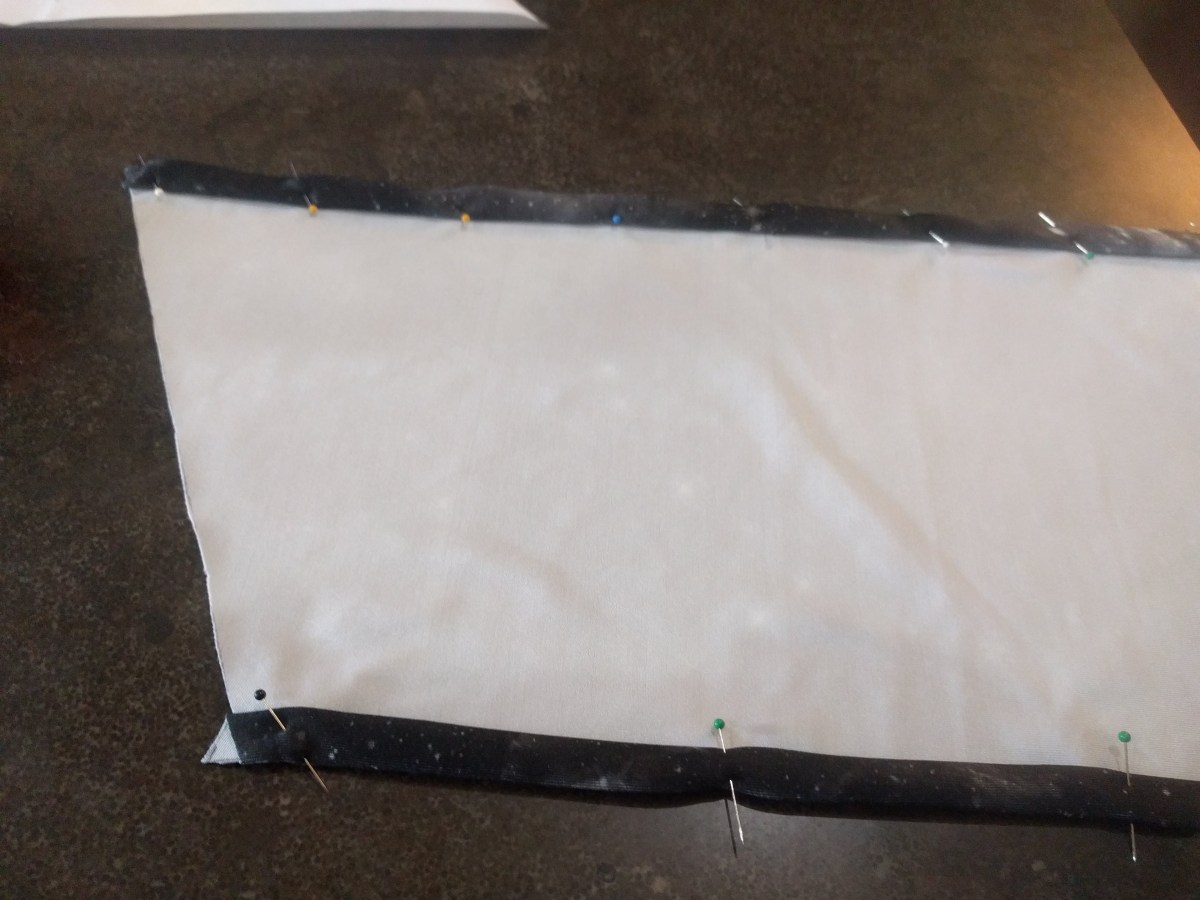
Now it’s time for the sewing machine. Sewing with spandex is tricky, so I recommend grabbing a few scrap pieces of fabric and testing out your stitches before trying it on your gaiter. Check tension. Because the fabric is stretchy the feeder feet will stretch out the bottom layer as it feeds through. You have to combat this with slow methodical sewing and careful feeding of the fabric, plus a little bit of stretching. You might even have to raise the foot once or twice to adjust how the fabric is feeding.
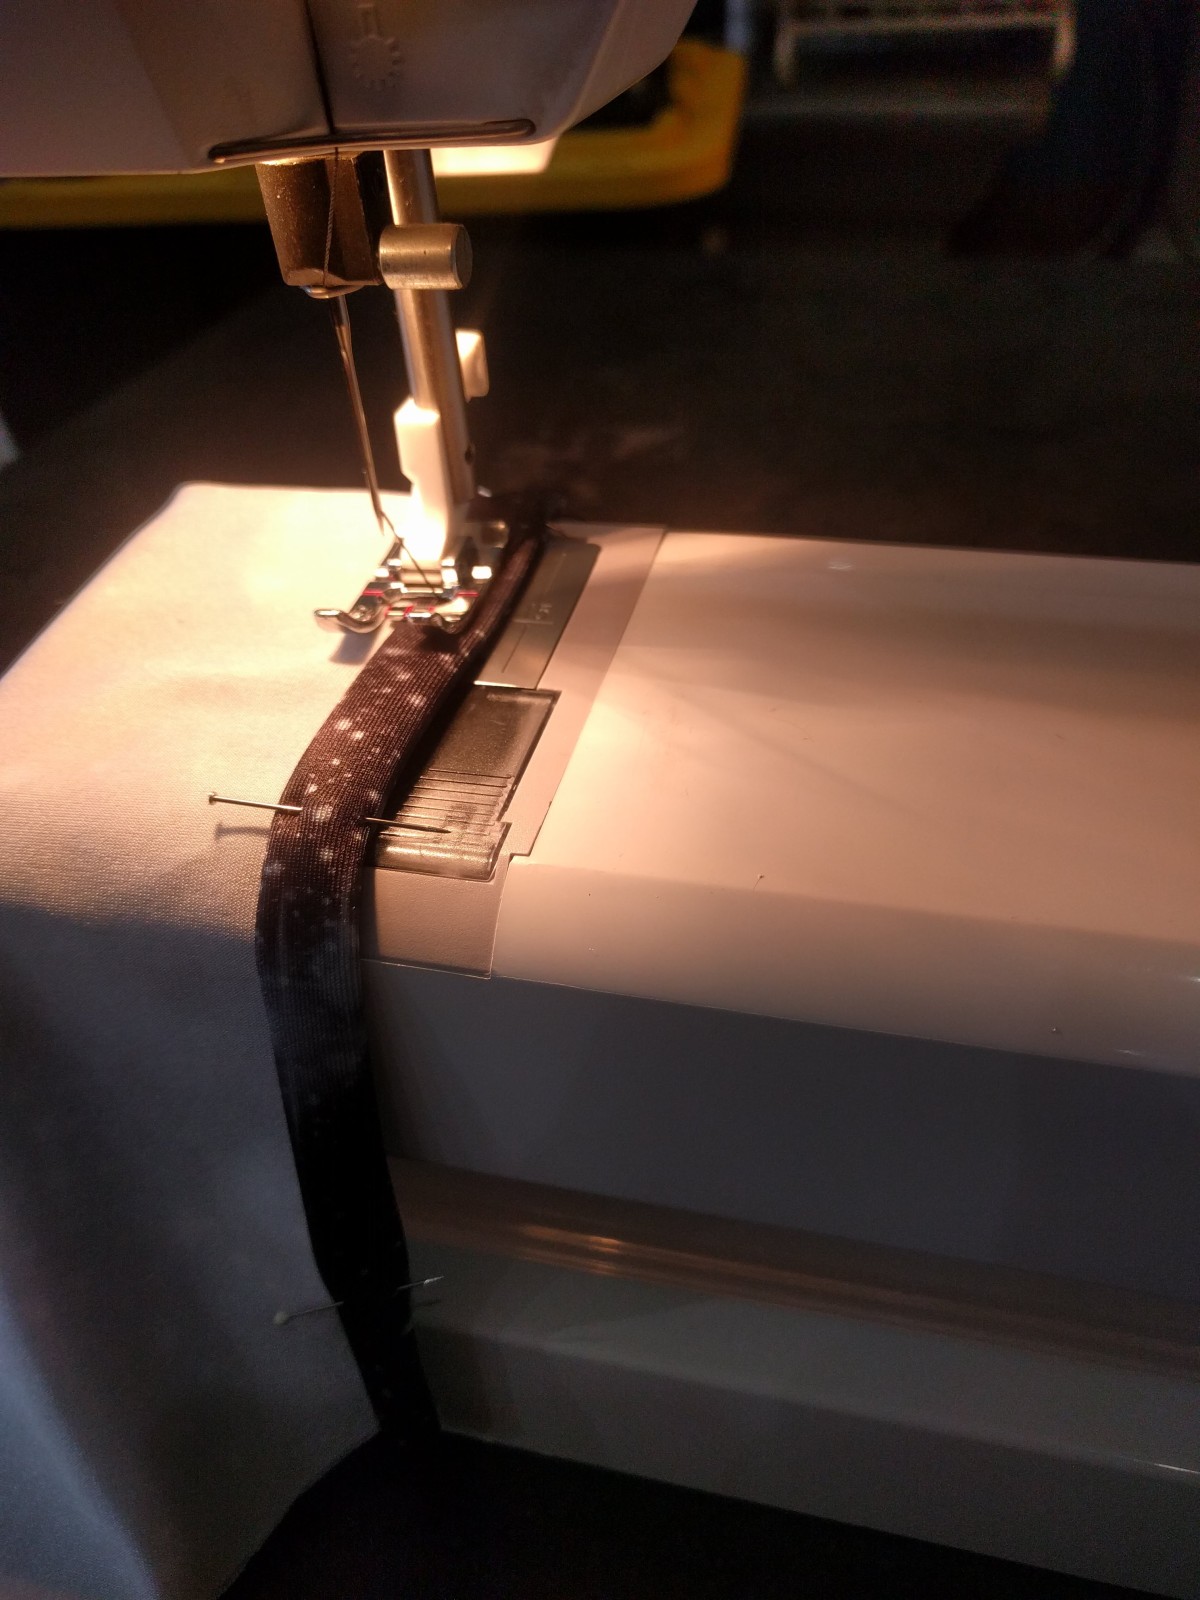
Time to get sewing. Use the zig-zag stitch to sew along the edge of the hem, removing pins as you go. There will be puckering. This is inevitable but once the gaiter is on your foot it won’t be noticeable so don’t worry too much about it. More stretching of the fabric means more puckering, so just be careful and do the best you can. I find it is easier to start from the middle of the fabric and sew to the edge, then turn it around and sew middle to edge again, rather than going from one end to the other.
Step Four: Sew the Edges
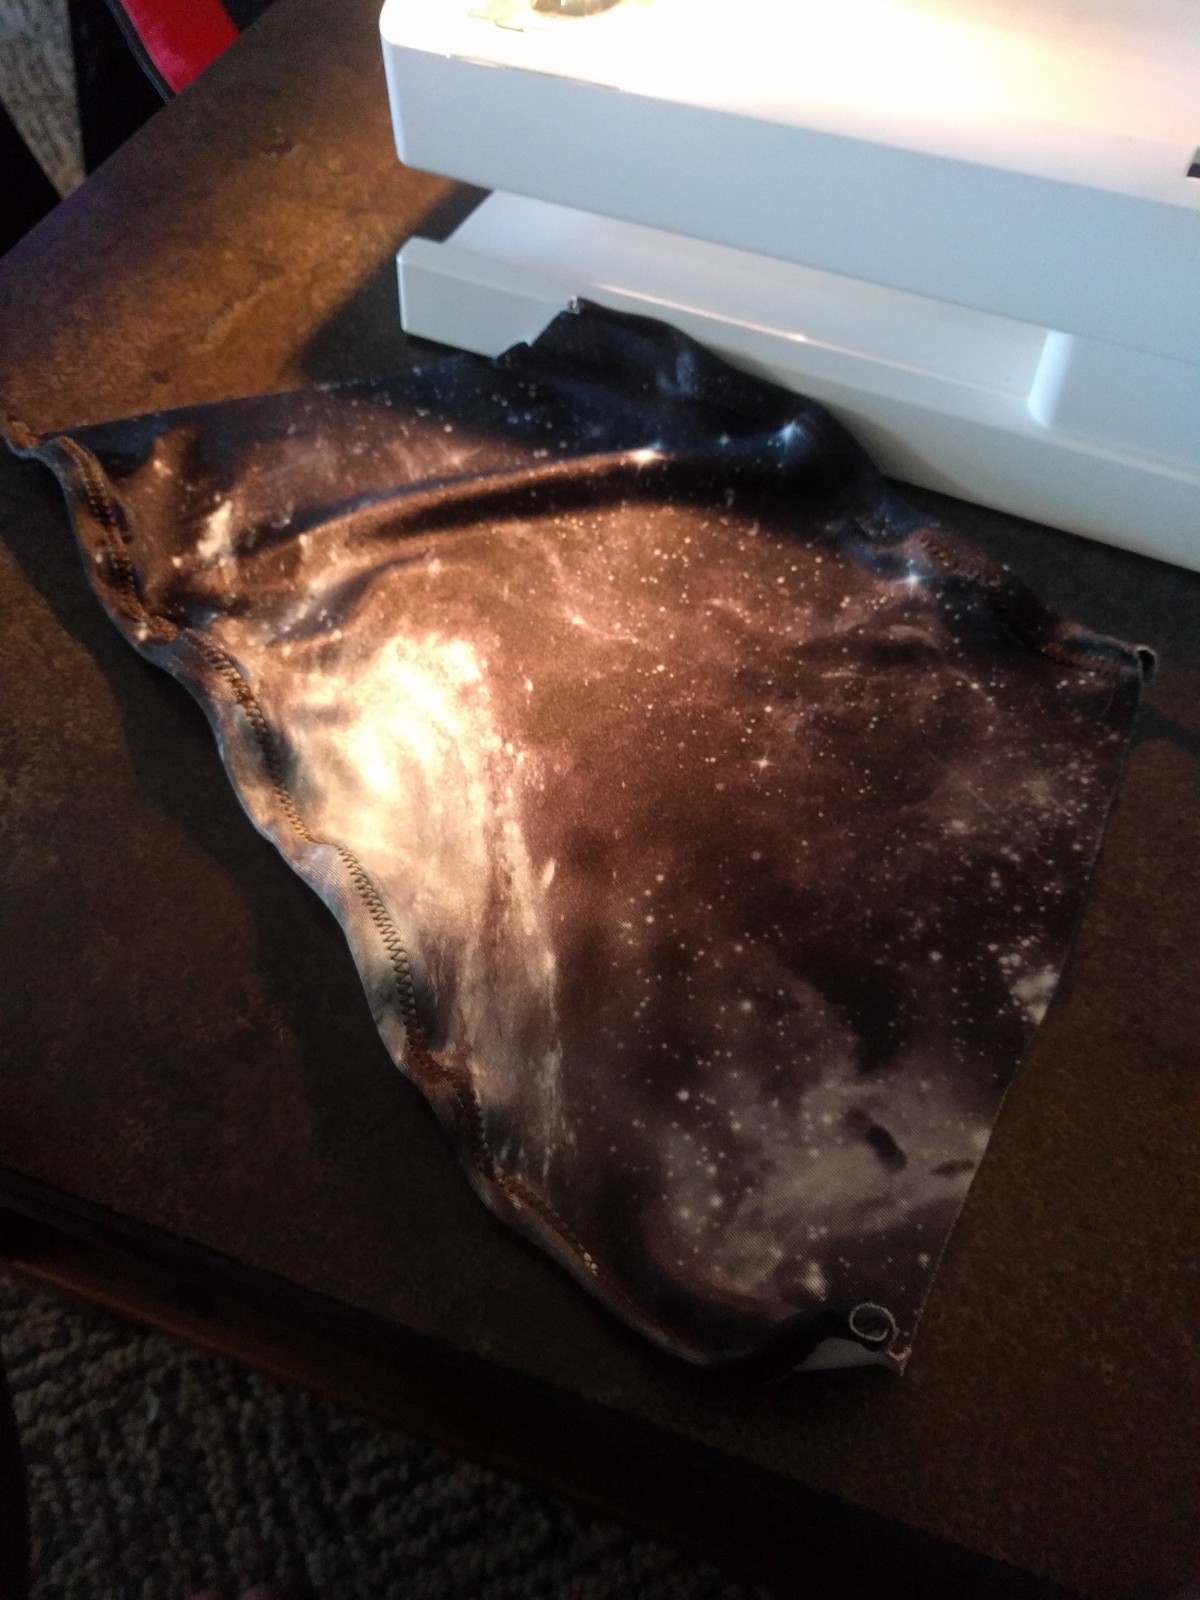
Once both top and bottom hems are complete, fold the fabric in half lengthwise. Keep the fabric inside-out, so you are looking at the unprinted side. Pin the two raw edges together. Again using the zig-zag stitch, sew the two pieces of fabric together as close to the edge as possible.

Switch your machine to a straight stitch. Sew a parallel line along the inside of the zig-zag stitch, from top to bottom.

The gaiter should still be inside out. Switch it to right side out, and try it on. This size should fit most, but now is the time to make sure it isn’t too loose or too tight on your calves. If it is too tight, you’ll have to start again with a new pattern, making the top measurement longer. If it is too loose, you can easily bring it in by sewing a new zig-zag and straight stitch slightly inside of the original, and trim out the excess fabric.
Step Five: Trim and Reinforce the Tip
Take the gaiter off, and bring your attention to the front point. There is a good deal of excess fabric here. Cut it off. We’re going to reinforce this area but we don’t want the tip sticking way out, so don’t worry about the raw edge.

Gather your durable nylon fabric, and cut out a rectangle several inches wide. Using a lighter, sear the edges to prevent fraying. We’re going to fold this over the tip, but for now, just line it up straight across, pin it and sew it in place with the straight stitch.

Front Side Pinned in Place

Underside Pinned in Place

Top Side Sewn On

Underside Sewn in Place
Turn it over, and fold the lower portions of the fabric over/around the “tip” and pin in place.

Trim off any excess bits of fabric and sear the edges. Using the straight stitch, sew along the edges of the reinforced tip as well as across the middle.

It should look something like this, but will vary slightly from gaiter to gaiter due to the uneven stretching of the fabric.

Step Six: Attach the Hook and Velcro
Almost done. Using a needle and thread, attach the hook to the reinforced tip of the gaiter. I like to attach it just so the edge of the hook aligns with the point of the tip.

Cut a strip of velcro (The soft fuzzy/loop side) about 2 inches long. Attach it to the inside of the gaiter, along the bottom and opposite to the tip (aka the heel end). Sew it in place using a straight stitch.
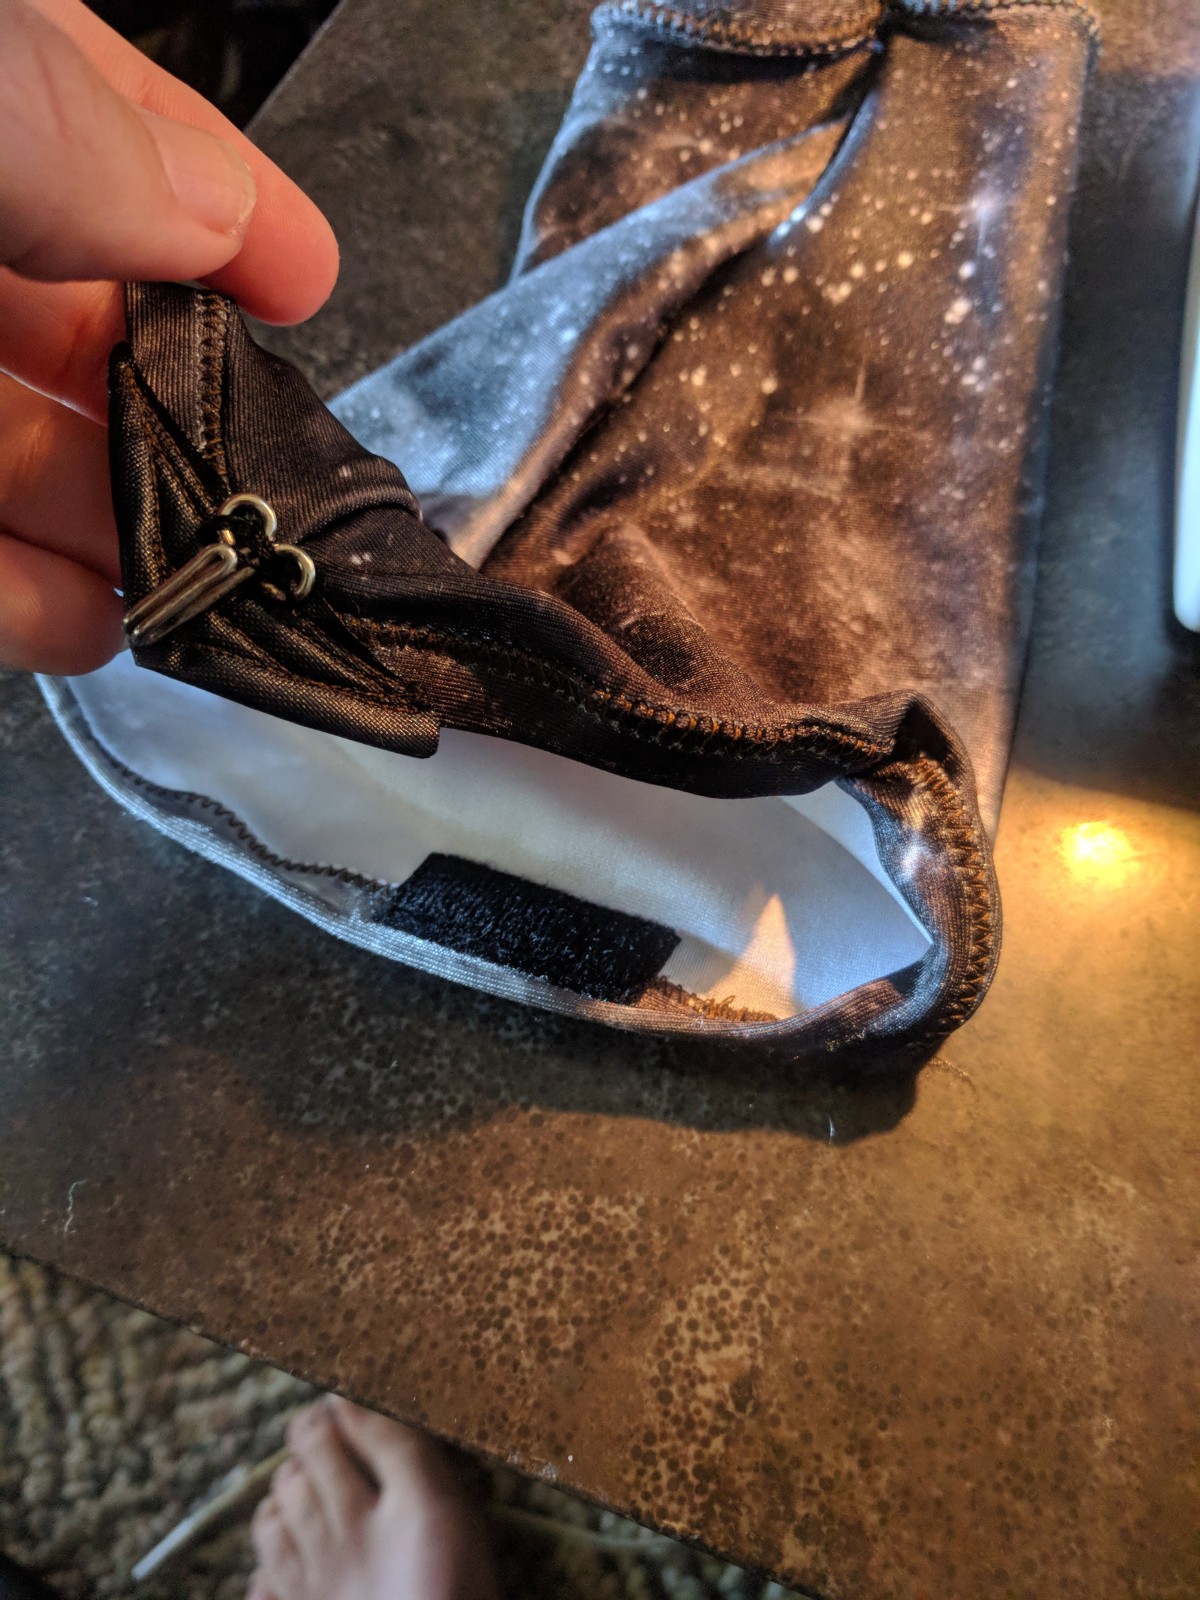
Shoes like Altras come with a gaiter trap already in place on the heel of the shoe. If you don’t have a gaiter trap, cut a similar size piece of velcro (the scratchy/hook side) to attach to the heel of the shoe. You can use Velcro with a sticky backing to it, or just use a bit of superglue to attach it to your shoe. Make sure the gaiter fits correctly before going on to the second one.
Repeat Steps 2-6, and Done! Put on your gaiters, put on your shoes. Attach the velcro pieces together, and use the hook to attach the tip to your shoelace (unless your shoes have an attachment point for gaiters).


I am continually in awe of everything y’all do…hiking , sewing , cooking , etc . One proud mom here ♡
LikeLiked by 1 person
[…] Done! You’ve got yourself a professional looking stuff sack you made yourself. IF you want this bag to be waterproof, make sure to get some silnylon seam sealer and seal the edges. Here’s my bag, filled with the 9 pairs of gaiters I just made! […]
LikeLike
[…] used scrap fabrics for several projects. I used the leftover stretchy spandex from making my gaiters to make a case for my sunglasses and for my monocular. I also used extra materials from my […]
LikeLike
[…] MYOG Gaiters […]
LikeLike
Reblogged this on moorishmicroadventure and commented:
An excellent tutorial that is well worth a read.
LikeLike
Cool, thanks!
LikeLiked by 1 person
Thank you for sharing! I just used your tutorial and it worked perfectly! I only made one adjustment: instead of the Velcro for the heel attachment, I used another scrap of poly fabric on the back with another hook that fit perfectly on my heel straps.
LikeLike
Thanks for sharing how you made gaiters. I’m trying these out now, but they look and feel great.
LikeLike
[…] simple, with a project like gaiters or stuff sacks. Maybe try a tarp or go bold and make your own quilt or sleeping bag. Not only does […]
LikeLike
[…] simple, with a project like gaiters or stuff sacks. Maybe try a tarp or go bold and make your own quilt or sleeping bag. Not only […]
LikeLike
My sewing machine doesn’t have a zig-zag option, is that going to be an issue?
Thanks
CarolK
LikeLike
You can use a straight stich, just make sure to stretch the fabric while you are sewing it, so it has room to stretch out when you put them on.
LikeLike
[…] Dirty Girl Gaiter or MYOG […]
LikeLike